REVIEW · SYDNEY
Mosaic Art Classes Sydney: Turkish Lamp Workshop
Book on Viator →Operated by Art Masterclass · Bookable on Viator
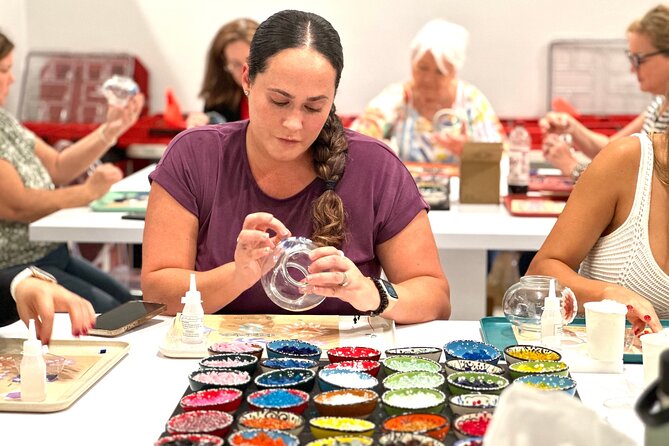
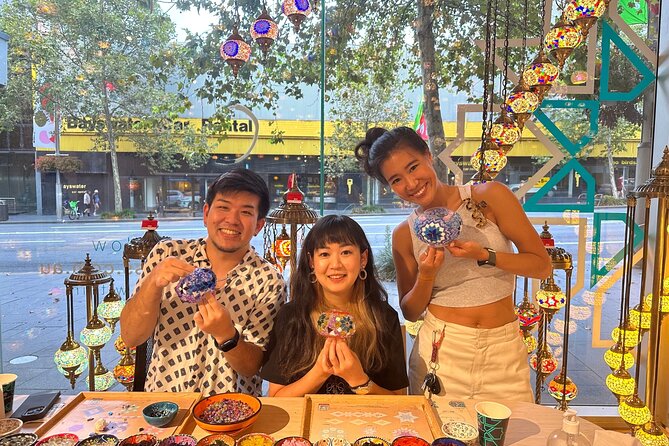
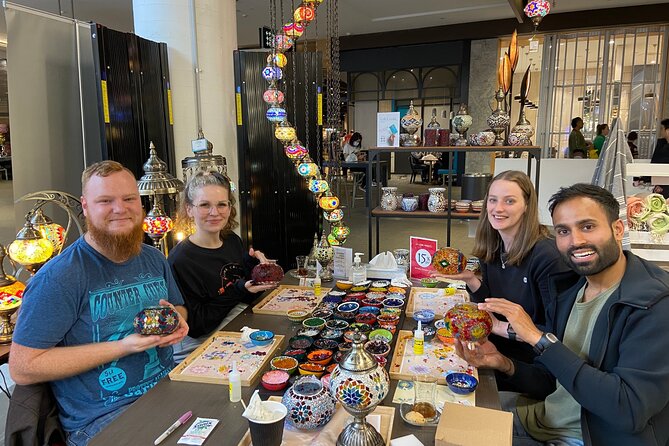
Turkish lamp making turns craft time into travel joy. In Sydney’s Darlinghurst, you decorate a glass candle holder with geometric mosaic patterns using a technique tied to a 500-year-old craft—all in a small boutique studio atmosphere with tea and snacks included. It’s the kind of activity that feels creative, but still very doable.
I especially like that you can follow a template design or go your own way with colors and patterns. You get pre-cut transparent glass shapes, you pick from a set of traditional template ideas, and the instructors guide you step-by-step so your lamp looks crisp—not chaotic.
One heads-up: part of the process happens after class. You transfer the design and assemble the mosaic during the workshop, then plastering is done after glue dries—either at home (equipment provided) or you can choose to have the studio finish it for an extra fee.
In This Review
- Key points before you go
- Darlinghurst studio setup: where the workshop starts (and what’s included)
- What you make: a Turkish mosaic candle holder you can display (or gift)
- Choosing your design: templates, colors, and geometric patterns
- The mosaic process: glue transfer, tile placement, and expert correction
- Step 1: transfer your chosen design to the glass base
- Step 2: assembling the mosaic
- Step 3: the final step happens after class
- Upgrading to a Table Lamp or Aladdin Lamp: bigger look, extra cost
- Value check: is $56.66 worth it in real terms?
- Timing and group size: why it feels relaxed, not rushed
- Who this Turkish lamp workshop is best for
- Tips to get a great result (without overthinking it)
- Should you book the Mosaic Art Classes Sydney: Turkish Lamp Workshop?
- FAQ
- What do I make with this workshop ticket?
- Can I upgrade to a larger lamp?
- What should I expect to do during the class?
- Do I need to finish anything after the workshop?
- Where is the workshop located?
- What is the cancellation policy?
Key points before you go
- Darlinghurst workshop location at 191 William St, easy to reach with public transport
- Small-group feel with a maximum of 32 participants
- Color and design freedom with 10+ colors and pre-cut transparent glass shapes
- Guided, hands-on mosaic technique from glue transfer to the final look
- Take-home result: your ticket starts as a Turkish mosaic candle holder
- Upgrade options for bigger pieces like a Table Lamp, Classic Turkish Lamp, or Aladdin Lamp
Darlinghurst studio setup: where the workshop starts (and what’s included)
This class runs in a boutique art studio in Darlinghurst, starting at 191 William St. Your workshop ends back at the same meeting point, so you’re not dealing with a long commute or a complex end-of-day plan.
The tone of the session is practical and friendly. You’re not just watching someone demonstrate—you’re doing the work. The class is about 2 hours 30 minutes, and that’s a good chunk of time for learning the steps, choosing a pattern, and finishing the main assembly.
You’ll also have refreshments waiting for you: hot drinks and snacks. It sounds like a small perk, but it matters here because mosaic work rewards patience. A warm drink helps you slow down enough to get the careful placement right.
A few more Sydney tours and experiences worth a look


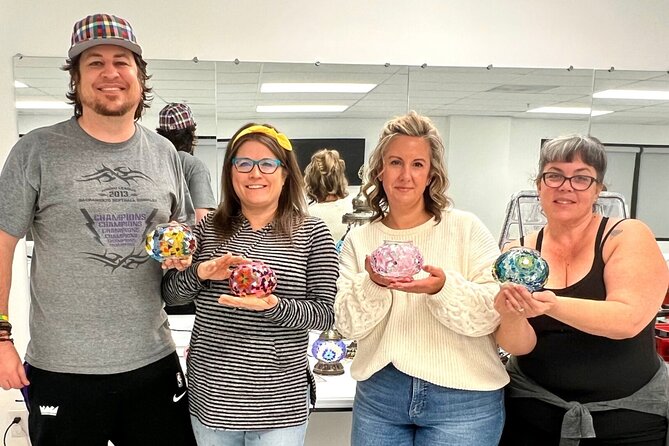
What you make: a Turkish mosaic candle holder you can display (or gift)
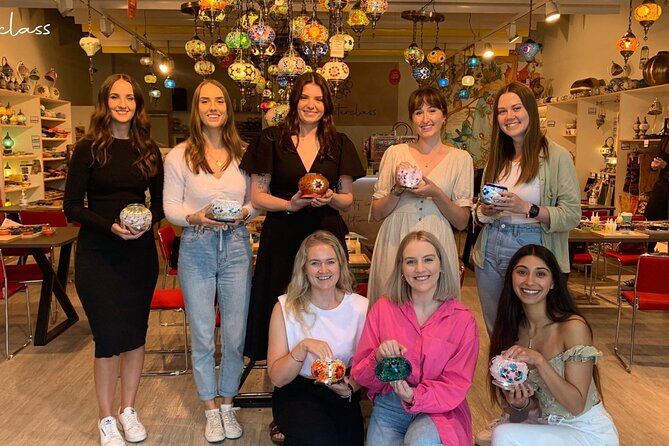
With this ticket, you’ll make a Turkish mosaic Candle Holder. It’s meant to be a finished keepsake you can take home and use.
That said, the studio clearly expects people may want to go bigger. The class includes options to upgrade to a Table Lamp, Classic Turkish Lamp, or Aladdin Lamp for an additional charge (each upgrade option costs extra). If you’re already thinking about a gift or something more statement-looking, it helps to know this early instead of deciding halfway through.
The candle holder format is also smart for the time you’re in the studio. You get the satisfaction of creating a real object—glass base, glued pieces, and a mosaic look—without needing an all-day production process.
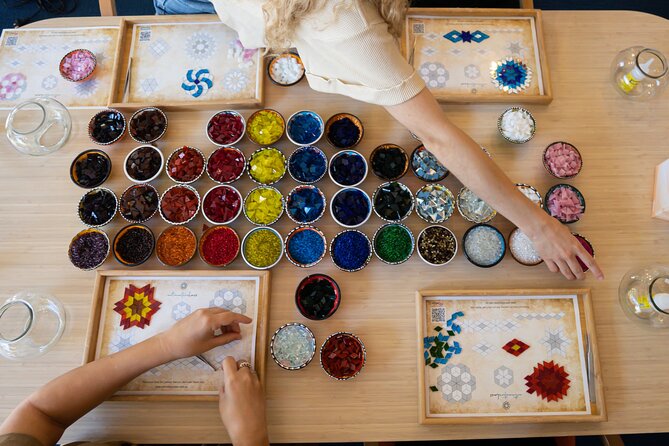
Choosing your design: templates, colors, and geometric patterns
This is the part that makes the workshop feel personal. You choose your geometric template, then build your design on top of that structure.
Here’s what you get to work with:
- 10+ colors to choose from
- pre-cut transparent glass shapes already sized for mosaic placement
- a selection of traditional design templates
- the option to use the template choices or create your own design
In plain terms, this is not a blank canvas where you have to invent everything. The templates help you get a balanced geometric look. If you’re the type who worries about artistic mistakes, that structure is a relief. If you’re feeling bold, you can still make your own pattern by mixing and matching shapes and colors.
The instructors help you select colors and designs that match your style. That matters because in mosaic work, color contrast and spacing are the difference between neat and messy. You’re learning what looks good while you make it.
The mosaic process: glue transfer, tile placement, and expert correction
The main workflow follows a logical sequence. You don’t just get tossed materials and a deadline; you learn the steps as you go.
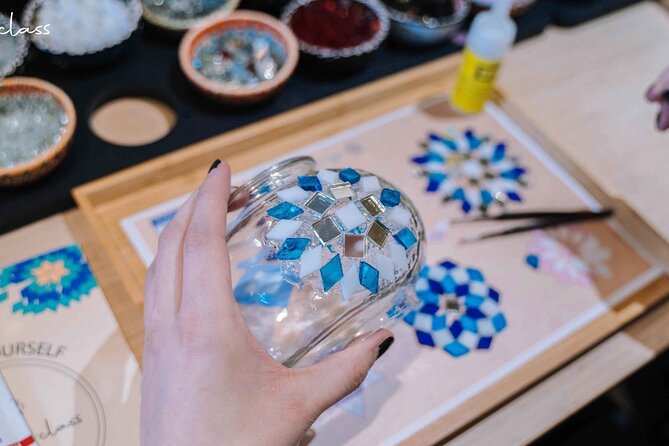
Step 1: transfer your chosen design to the glass base
After you pick your color(s) and design, you transfer the pattern onto your glass candle holder using special glue. This step is where instructors usually save you time and stress. If you place your shapes off-grid or run out of room, your final mosaic won’t sit evenly.
- Blue Mountains Small-Group Tour from Sydney with Scenic World,Sydney Zoo & Ferry
★ 5.0 · 3,709 reviews


Step 2: assembling the mosaic
Once the pattern is placed, you assemble the mosaic with the pre-cut glass pieces. This is where patience matters. Mosaic work is mostly small decisions: angle, spacing, and consistency.
The good news is that the class is set up for correction. The instructors can help if something goes wrong, including adjusting or fixing your design while you’re still in progress. That kind of real-time support is one reason this workshop earns such strong satisfaction.
Step 3: the final step happens after class
At the end of the workshop, you’ll reach the main assembly stage. The remaining finishing step is plastering after the glue has dried. You get equipment to do this at home.
If you want the process handled for you, you can also choose to leave the studio to do the plastering for an extra fee. If you’re traveling and don’t want one more step after you’ve packed your bags, that upgrade option is worth considering.
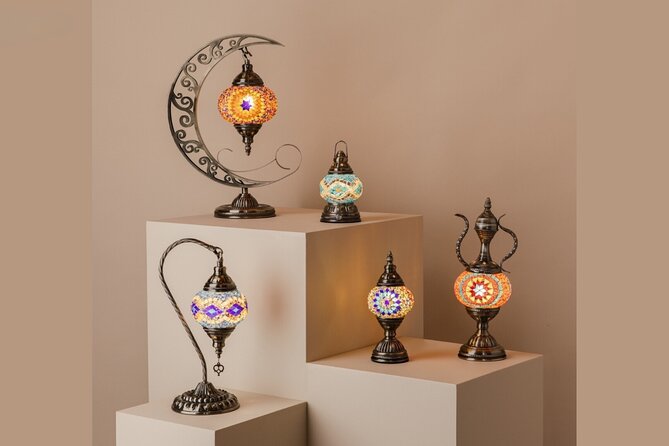
Upgrading to a Table Lamp or Aladdin Lamp: bigger look, extra cost
The ticket starts you with a Candle Holder, but the studio gives clear pathways to larger pieces. Upgrades include:
- Table Lamp
- Classic Turkish Lamp
- Aladdin Lamp
These options cost extra, and the studio explains the upgrades in order (each additional option has its own charge). So the smart move is to decide early based on what you want the finished piece to do in your space—ambient light, a stronger visual centerpiece, or a more elaborate gift.
A bigger lamp also usually means more attention to detail, because you’ll be working with a larger surface area. If you love the process and you’re enjoying the creative part, upgrading can turn a fun afternoon into something that feels more “worth framing.”
Value check: is $56.66 worth it in real terms?
At $56.66 per person, the value comes from the combination of time, materials, and guidance.
You’re paying for:
- a structured workshop time (about 2.5 hours)
- instructor-led support for designing and assembling your mosaic
- materials including pre-cut glass shapes, templates, and the tools for the process
- hot drinks and snacks
- a take-home object as the main outcome
If you’ve ever tried a DIY craft where you pay for supplies but then struggle through the steps alone, you’ll understand the value of having someone guide placement and help with corrections. The class is set up to make a great-looking result realistic for most people.
The only thing to watch on value is that upgrades and the optional studio plastering step come with extra fees. If you want the object fully finished during the same day (so you don’t do anything at home), confirm which finishing choice matches your comfort level.
Timing and group size: why it feels relaxed, not rushed
With a maximum of 32 participants, the room shouldn’t feel chaotic. You’ll still share space with others, but the format is built for hands-on work, and that usually needs time for individual help.
The pace also matters: 2 hours 30 minutes is long enough to choose a design, transfer it, assemble your mosaic, and leave with the main steps completed. It’s not a quick stop-and-snap workshop where the result looks unfinished.
If you’re the kind of person who hates rushing, this timing is a good fit. Mosaic art punishes speed, but it rewards focus. This class gives you time to get it right.
Who this Turkish lamp workshop is best for
This workshop fits a lot of travel styles.
You’ll enjoy it if:
- you like creative activities on trips that end with something you can use at home
- you want a hands-on way to experience Turkish-inspired design without needing deep background
- you’re traveling with friends who want to do something different than another museum stop
- you want structured support, especially when choosing colors and design placement
It also works well for gift ideas. A handmade mosaic lamp or candle holder feels personal fast, and you’re not relying on generic souvenirs.
If you dislike any post-class work, the plastering step is the only likely mismatch. Since you may be asked to finish plastering at home after glue dries (unless you choose the optional studio finish), plan your schedule accordingly.
Tips to get a great result (without overthinking it)
Here are the practical things that make a difference in mosaic-style workshops.
First, don’t aim for perfection in your head. Aim for consistency in placement and spacing. The templates help, but your success still comes from steady, careful work.
Second, take a little time with color selection before you start gluing. In geometric mosaic designs, a good contrast helps your pattern read clearly. If you’re unsure, ask the instructor to help you balance colors and choose what will look good once the glass pieces are set.
Third, plan for the drying-and-finishing step. If you’re finishing plastering at home, give yourself the time and calm needed to do it carefully after the glue dries. If you’re not into that, consider the option for the studio to plaster for you for a fee.
Finally, if you’re short on time when you arrive or you’re navigating Sydney on foot, arrive a little early so you can settle in, choose your design, and start the process without feeling rushed. The meeting point is in Darlinghurst, so it’s easy to fit into an afternoon.
Should you book the Mosaic Art Classes Sydney: Turkish Lamp Workshop?
If you want a creative Sydney activity with a real take-home outcome, I’d book this. The studio format supports beginners, you get real instructor guidance, and the result is a designed object you can light up or display at home.
Book it especially if you care about quality and prefer structured help over a DIY free-for-all. The hot drinks and snacks are a nice bonus, but the bigger win is that you’re learning a recognizable craft step-by-step—so your final candle holder looks intentional, not accidental.
Skip it or plan carefully only if you really don’t want any finishing step after class. The plastering-after-glue-drying stage is part of how this workshop works, even though an optional studio finish can reduce your workload at home.
FAQ
What do I make with this workshop ticket?
With this ticket, you make a Turkish mosaic Candle Holder.
Can I upgrade to a larger lamp?
Yes. You can upgrade to a Table Lamp, Classic Turkish Lamp, or Aladdin Lamp for an extra charge. The upgrades are listed in that order.
What should I expect to do during the class?
You’ll choose a geometric template and your color design, transfer it onto your glass candle holder with special glue, and assemble the mosaic pieces. You’ll also learn the techniques used for laying the tiles.
Do I need to finish anything after the workshop?
Yes. After the glue dries, there is a plastering step. You can do it at home with the equipment provided, or you can choose to have the studio do the plastering for a fee.
Where is the workshop located?
The workshop starts at 191 William St, Darlinghurst NSW 2010, and it ends back at the same meeting point.
What is the cancellation policy?
You can cancel for a full refund up to 24 hours before the start time. If you cancel within 24 hours of the start time, the amount paid is not refunded.

More Workshops & Classes in Sydney

More Tour Reviews in Sydney
- Blue Mountains Small-Group Tour from Sydney with Scenic World,Sydney Zoo & Ferry
★ 5.0 · 3,709 reviews