REVIEW · ADELAIDE
Adelaide Walking Tour: Hills, Squares and Parklands
Book on Viator →Operated by Down to Earth Tours · Bookable on Viator
North Adelaide has its own pace and personality. This walking tour turns ordinary streets into a clear story of colonial-era Adelaide to later institutions—using architecture as your guide. You’ll move through hills, squares, and parkland edges while your local guide connects buildings to the people who lived, studied, worked, and worshipped there.
What I really like is the focus on architecture plus human stories. The best moments come when the guide helps you read details you’d normally walk past—front facades, building styles, and how a place evolved over time. I also like that it’s a small group setup, which makes it easier to ask questions and keep up with the pace.
One consideration: this is still a walking tour, about two hours, and it operates in all weather. If you’re not into steady walking or you hate hills, you may want to plan your comfort carefully.
In This Review
- Quick hits before you go
- The Two-Hour Sweet Spot for North Adelaide’s Hillier Sides
- Wellington Hotel and the Fast Adelaide Orientation You Actually Need
- Wellington Square to Cortina: Learning to Read Facades Like a Local
- Jeffcott Street and Whinham College’s Afterlife in the Lutheran Seminary
- Kingsmead, Duncraig, and the Tour’s Slightly Spooky Victorian Stories
- Montefiore Hill’s Light’s Vision: William Light and a First Public Hanging
- Carclew, Twin Cottages, and the Neighborhood’s Educational Engine
- Primitive Methodist Church and Closing the Loop Back at North Adelaide
- Price and Value: Is $36.93 Worth It?
- Who Should Book This Tour (and Who Might Feel Restless)
- Should You Book Adelaide Walking Tour: Hills, Squares and Parklands?
- FAQ
- How long is the walking tour?
- What is the meeting point and start time?
- How much does the tour cost?
- Is transportation included?
- What group size should I expect?
- Does it run in bad weather?
- What is the cancellation policy?
Quick hits before you go
- Graeme’s story-and-facts style helps the neighborhood feel personal, not like a textbook.
- About two dozen heritage stops means you’ll see a lot without feeling like you’re rushing.
- Montefiore Hill and Light’s Vision give you a standout moment tied to Colonel William Light and a first public hanging.
- Churches, schools, and colleges show how North Adelaide grew as a place for education, faith, and community.
- Victorian house stories include darker local history, like the suicide tale linked to a bay-windowed villa.
- No food included, so you’ll likely want a plan for before or after if you arrive hungry.
The Two-Hour Sweet Spot for North Adelaide’s Hillier Sides
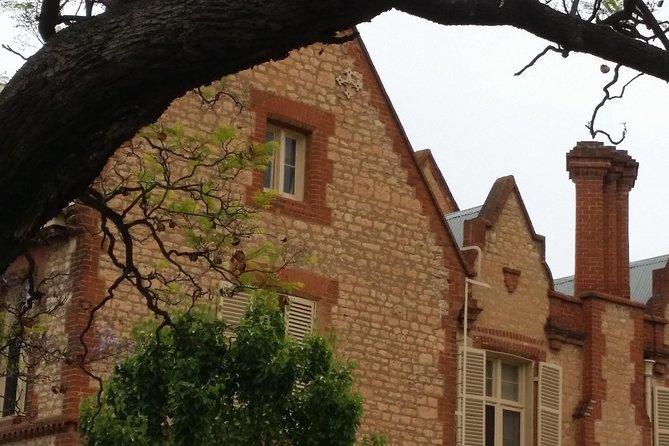
This tour is built for people who want a strong sense of place without committing to a full day. In about 2 hours, you’ll cover a route that mixes street-level architecture with quick, guided context. It’s a good way to understand North Adelaide fast, especially if it’s your first time in the city.
You’ll also get a practical benefit: the small-group format keeps the experience conversational. With a maximum of 20 travelers (and up to 15 per booking), you’re less likely to feel like a number. And since the tour uses a mobile ticket, there’s no real fuss once you’re at the start.
The main “watch-out” is that it runs in all weather conditions. Adelaide can change its mood quickly, so dress for wet or cool conditions and wear shoes you trust for sidewalks and slopes.
You can also read our reviews of more walking tours in Adelaide

Wellington Hotel and the Fast Adelaide Orientation You Actually Need
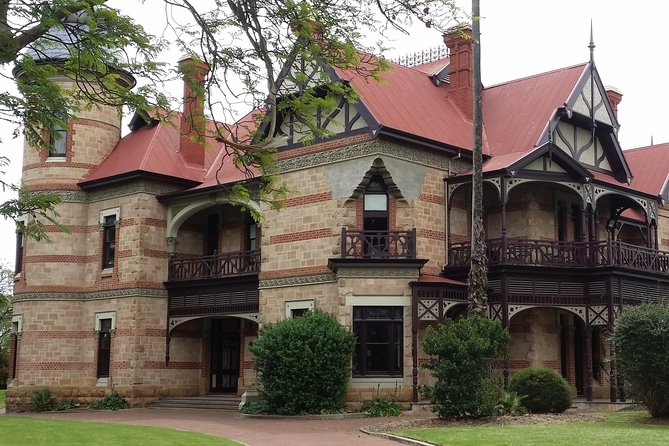
You start at Wellington Hotel, 36 Wellington Square, North Adelaide. That first stop matters because it frames what you’re about to see, and it helps you mentally “lock in” the neighborhood layout. The guide gives a quick intro to Adelaide and North Adelaide’s development, plus a sense of the route and timing.
Wellington Hotel itself is more than a meeting point. Your guide uses it as an entry into the larger story of how North Adelaide formed. Even if you’re not a pub person, you’ll still get something useful here: the tour’s perspective. Instead of treating buildings like random landmarks, you’re taught to look at them as steps in how the area grew.
If you arrive early, use those extra minutes to look around Wellington Square. You’ll spot the kinds of details the guide will keep pointing out later—architectural clues, building rhythm, and how streetscape design shapes neighborhood identity.
Wellington Square to Cortina: Learning to Read Facades Like a Local
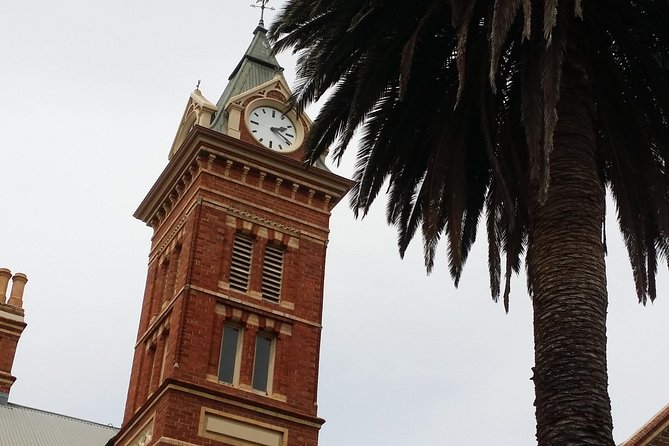
The middle of the early stretch is all about learning visual “tells.” You’ll move from Wellington Square into nearby streets where the guide explains what to notice in architecture. This part works well because it doesn’t require technical training; you just learn what to look for.
At the shop and square area, expect a short history and an architectural snapshot. Then you’ll get into specific buildings, including Cortina, described as tied to two-storeyed houses—with notes on history and occupants. It’s the kind of stop that teaches you how to connect architecture to everyday life, not just dates and names.
From there, the tour points out a house with cast-iron detail. These features are exactly what you’ll miss if you only take photos. Here, you learn how development patterns and design choices reflect the time when the buildings were built and upgraded.
Another named stop is Clifton, where the guide continues the occupant-and-style approach. The value isn’t that you memorize every name. The value is that by the time you’ve reached the next hillier section, you’ll already feel more confident reading the streets around you.
Jeffcott Street and Whinham College’s Afterlife in the Lutheran Seminary
A good walking tour doesn’t just show you pretty buildings. It helps you understand why certain places keep getting repurposed. This section leans hard into that idea.
On Jeffcott Street, you’ll hear about a particular house and its previous owner, with the guide highlighting the personal side of local history. You’ll also stop at the Lutheran Seminary, described as the former Whinham College. That transition is one of the strongest ways to understand North Adelaide: institutions changed, but the neighborhood framework remained.
The guide focuses on history, architecture, and developers of the site. You’ll also see how education and religion aren’t separate stories in this area—they overlap. Churches and colleges show up throughout the tour, and this stop gives you a clear example early enough that it makes the later school-and-church sites click.
Then there’s Gable House, again with a focus on a previous occupant and the way the building fits into the local timeline. If you’re the type who likes “why this place matters,” this section delivers.
A small practical note: these stops are brief. You’ll get context quickly, then you move on. If you prefer slow sightseeing, keep your questions ready so you can use the guide’s attention efficiently.
Kingsmead, Duncraig, and the Tour’s Slightly Spooky Victorian Stories
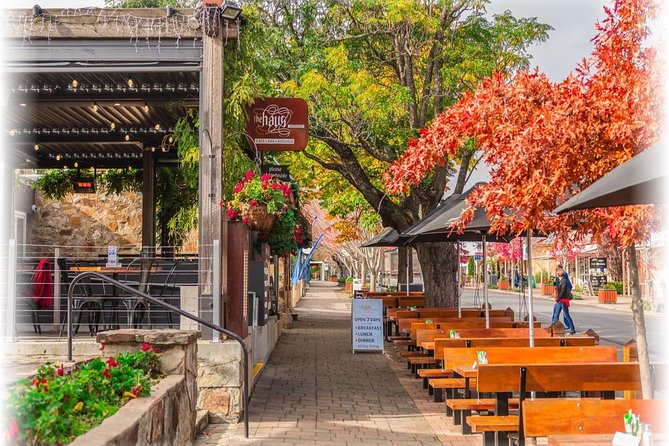
This is where the tour shifts from tidy to dramatic—in a good way. You’ll encounter Kingsmead and hear about design, history, and previous occupants. The guide’s goal here is to show how style choices can signal social standing, time period, or the neighborhood’s growth stage.
Next is Duncraig, where the focus includes history and occupants, plus a pioneering connection. It’s the kind of story that adds weight to what might otherwise look like another house on a residential street.
Then comes one of the tour’s headline moments: a Victorian bay-windowed villa with a suicide story connected to it. Dark local history can feel uncomfortable if you’re not in that mood, but it also makes the neighborhood feel real. Buildings aren’t only bright and ceremonial. They hold human moments, including painful ones.
After that, the route includes another stop listed as Bisho… (the name is truncated in the information I received). I’d treat this as a cue that the guide will keep tying the next landmark to people and context, not just architecture.
If you’re traveling with someone who hates grim stories, you can still enjoy the rest of this section. The guide usually keeps the tone focused on history, not sensationalism, but be aware that the tour does include at least one serious narrative.




Montefiore Hill’s Light’s Vision: William Light and a First Public Hanging

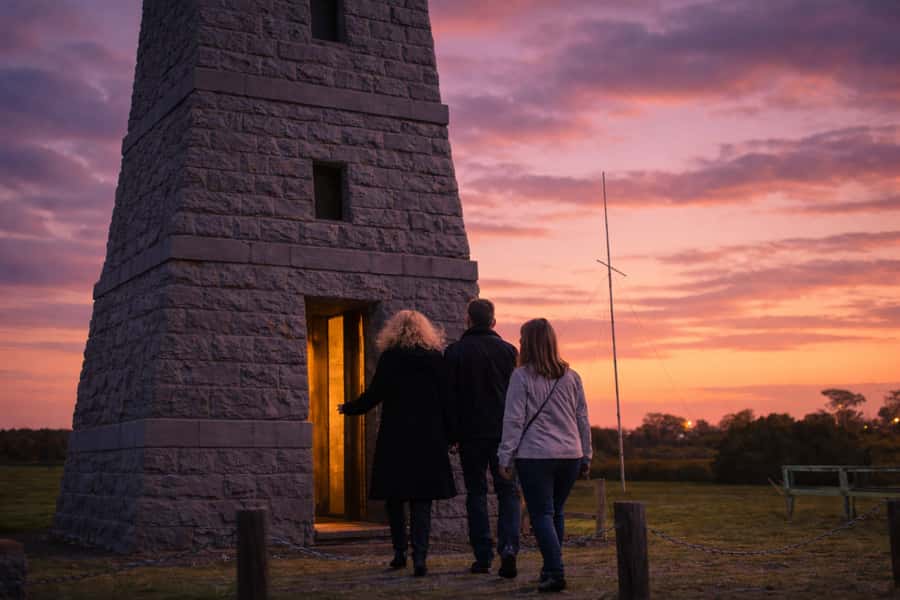
This is the stop that you’ll remember after you’ve left North Adelaide. Light’s Vision on Montefiore Hill connects a defining historical figure to a stark event. Your guide explains the site’s history, tells the story of Colonel William Light, and connects it to a first public hanging.
Even if you already know Light’s name from general Australian history, this stop gives you the local Adelaide angle—how the city’s plans, prominent people, and public events became part of the landscape. Standing at a place like this with a guide helps you see how broad history lands in specific streets and sites.
In practical terms, this is a great mid-tour break from pure residential architecture. It also sets your mental lens for the rest of the walk: you’re not just touring pretty buildings. You’re learning how North Adelaide sat inside the larger story of the colony, governance, and public life.
If the weather turns, this is also a reminder to pace yourself. Montefiore Hill can feel more exposed than some of the surrounding streets, so wear the layers you need.
Carclew, Twin Cottages, and the Neighborhood’s Educational Engine
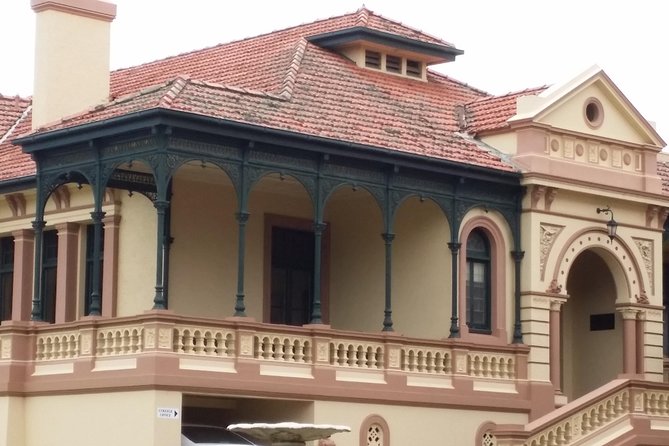
After the hill-top historical hit, the route returns to places that show how people built community. Carclew is one of the standout stops in this section, with your guide sharing the house’s history and occupants, including a connection with a famous explorer. That’s a fun combo—architecture, local identity, and big names all in one.
Then you’ll see twin cottages, with the guide covering history and previous occupants. Cottages can look simple from the outside, but this is where the tour’s method shines. When the guide explains who lived there and how the neighborhood evolved, you start to “see” the building’s purpose rather than treating it as scenery.
The tour also includes a former Christ Church School, with history and architecture discussed. Schools are great for understanding local society because they show what communities valued—and how buildings get adapted over time as needs change.
Another named stop is Milford House Private Hotel (formerly Milford House Private Hotel). Your guide shares a story of development and the associated occupants. I like this kind of stop because it shows the neighborhood as a living system: homes became lodging, lodging became institutions, and the street kept its role in day-to-day life.
This section is especially good for you if you like learning how places functioned—who used them, why they were built, and what changed next.
Primitive Methodist Church and Closing the Loop Back at North Adelaide
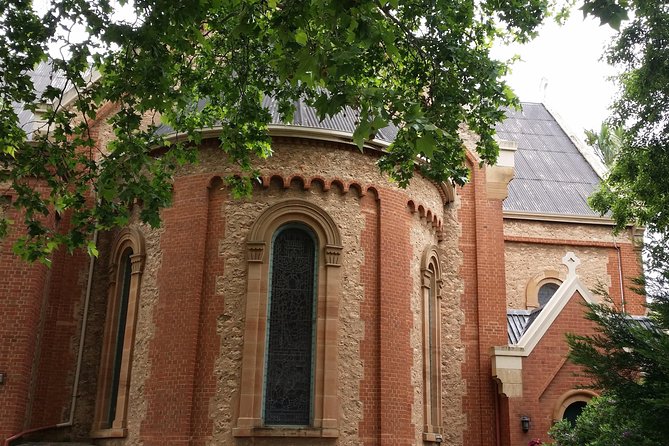
The final stretch focuses on faith and community infrastructure. You’ll visit a Former Primitive Methodist Church, and your guide covers both historical use and how it’s used now. That before-and-after framing is powerful because it shows continuity in the neighborhood: even when styles or denominations shift, the building still holds community meaning.
What I find valuable here is the tour’s closing “loop.” After learning about houses, colleges, and public events, you end with a place that ties the stories back to everyday community life—gathering, teaching, and shared identity.
Once you reach the end, the tour finishes back at the meeting point at Wellington Hotel. It’s a clean wrap-up, and it makes it easy to keep exploring North Adelaide on your own right away.
Price and Value: Is $36.93 Worth It?
At $36.93 per person for about 2 hours, this tour sits in the affordable, high-information category. You’re paying for a local guide and a structured walk through a concentrated area. Since the visits are focused on external viewing and on-site storytelling, there’s no mention of costly entry fees—many stops are marked free.
Here’s the real value math: you get roughly two dozen historical sites covered with context, and you’re not expected to research each building beforehand. That saves time, and it also helps you avoid the common tourist trap of reading plaques incorrectly or missing the point entirely.
Two extra notes that matter for your wallet:
- Food and drinks aren’t included, so plan a snack or meal before or after.
- No transportation is included, so you’ll want to factor in getting yourself to Wellington Square and returning later.
Also, the guide is the star. The one review highlight I saw mentions Graeme and specifically calls out how he brought history alive with a mix of story and facts. That blend is exactly what makes a history-and-architecture tour feel worth the price instead of feeling like a lecture.
Who Should Book This Tour (and Who Might Feel Restless)
This is a strong match if you:
- Love local history but want it tied to real buildings you can see.
- Enjoy architecture reading, even at a basic level.
- Like tours where the guide connects buildings to the people who lived there.
It’s also a nice choice if you’re in Adelaide for a short time and want a clear orientation to North Adelaide’s neighborhoods, without driving.
You might consider a different tour if you:
- Want mostly scenic views and minimal walking.
- Dislike any darker history. This route includes a suicide story tied to one of the homes, plus a stop involving a first public hanging.
- Expect a food-focused experience. This one is about stories and sites, not meals.
Weather note: it runs in all conditions, so pack for what Adelaide decides to do that day.
Should You Book Adelaide Walking Tour: Hills, Squares and Parklands?
If you want to understand North Adelaide quickly, this is one of those practical tours that turns curiosity into real knowledge. I’d book it if architecture and history are your kind of travel. It’s short enough to fit a busy itinerary, structured enough to feel efficient, and guided enough that you don’t have to guess what you’re looking at.
If you’re the kind of traveler who enjoys asking questions and hearing why a neighborhood grew the way it did, you’ll get plenty out of the walk—especially with a guide like Graeme, who’s praised for mixing story and facts in a way that actually lands.
If you’re sensitive to heavy historical moments, you can still enjoy the tour, but go in knowing there are serious stories on the route.
FAQ
How long is the walking tour?
It runs for about 2 hours.
What is the meeting point and start time?
You meet at Wellington Hotel, 36 Wellington Square, North Adelaide SA 5006, and the start time is 10:00 am.
How much does the tour cost?
The price is $36.93 per person.
Is transportation included?
No. Hotel pickup and drop-off and transportation to and from attractions are not included.
What group size should I expect?
There is a maximum of 15 people per booking, and the tour/activity has a maximum of 20 travelers.
Does it run in bad weather?
Yes, it operates in all weather conditions, so you should dress appropriately.
What is the cancellation policy?
You can cancel for a full refund if you cancel up to 24 hours in advance of the experience start time. If you cancel less than 24 hours before, the amount paid is not refunded.