REVIEW · GOLD COAST
Gold Coast: Indoor Skydiving Experience
Book on GetYourGuide →Operated by iFLY Indoor Skydiving AU · Bookable on GetYourGuide
That first burst of wind is weirdly addictive.
This Gold Coast experience gives you the feeling of flying your body in free-fall—no plane, no jump, no parachute. I love that the package includes two flights, so you get more time in the airflow than a typical one-off skydive intro. Another big plus is how approachable it is: training is built in, and it’s designed for a wide age range.
You do need to plan timing and stay inside the rules. Late arrivals can’t be refunded, and there are clear weight/health limits (especially for heart issues, pregnancy, and some injuries). One small wrinkle: one recent booking note says a participant didn’t get the second flight, so I’d be extra careful about arriving early and asking your crew about how your session will run.
In This Review
- Key Points to Know Before You Go
- Why an Indoor Free-Fall Flight on the Gold Coast Feels So Real
- The Two-Flight Package: What You Get and How It Compares
- From Check-In to Gear-Up: Your 90-Minute Rhythm
- Finding the Place: Red Floor Entrance, Stairs, and a Backup Door
- How the Flight Works Inside the Glass Wind Tunnel
- What the Instructor Teaches (and Why It Matters for First-Timers)
- Who This Suits Best: Ages, Safety Rules, and Health Limits
- Price and Value: Is $66 Actually a Good Deal?
- The Most Praised Bits: Fun, Family-Friendly Coaching, and Real Control
- Should You Book It for the Gold Coast?
- FAQ
- What’s the duration of the Gold Coast indoor free-fall experience?
- What’s included in the 2-flight package?
- What should I wear or bring?
- How early do I need to arrive?
- Are there weight or height limits?
- Is it safe for kids and seniors?
Key Points to Know Before You Go
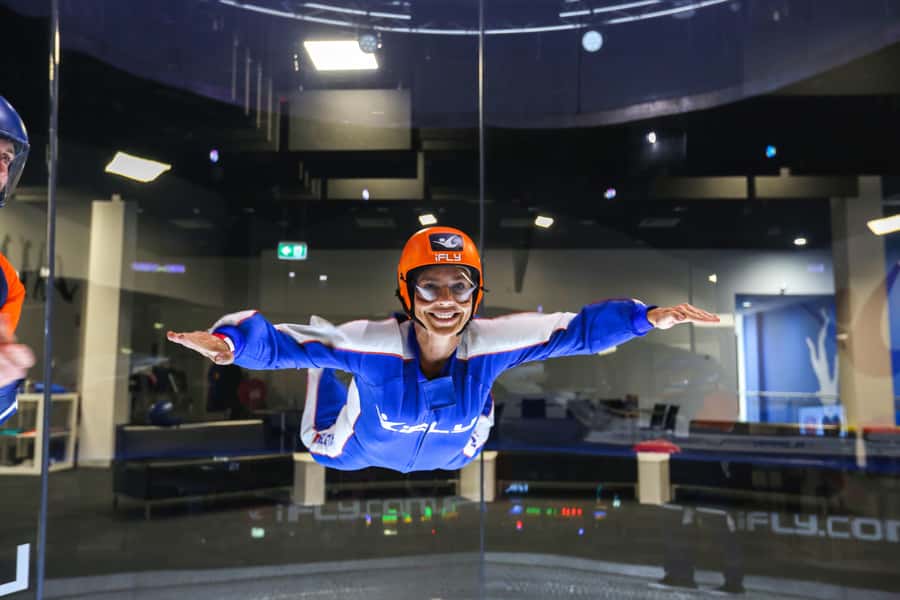
- Two flights = more airflow time: your 2-flight package is set up to feel like getting extra free-fall time in one visit.
- Full gear and instruction included: suit, helmet, goggles, and hands-on coaching come with the price.
- It’s a controlled glass-tunnel setup: you’re lifted by a column of air and guided throughout, with no parachute.
- For kids and adults: it’s promoted as suitable from age 3 up with the right guidance and requirements.
- There are firm body/health limits: weight, pregnancy, heart concerns, and some injuries can affect eligibility.
- A personalized flight certificate: you leave with a keepsake that matches the effort you put in.
Why an Indoor Free-Fall Flight on the Gold Coast Feels So Real
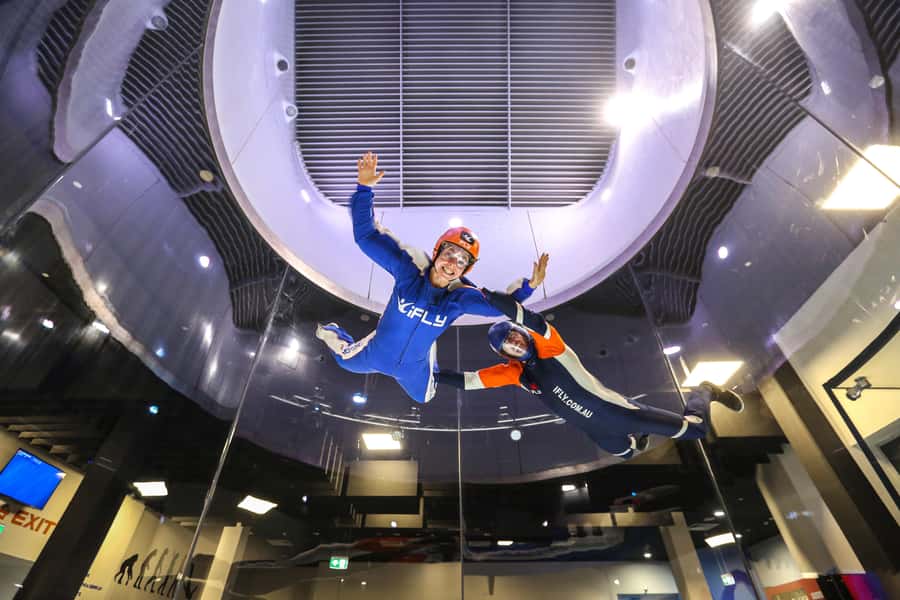
The magic here is simple: your body learns the skydiver position using airflow, not aircraft. After a quick briefing and a gear-up, you step into a giant glass tunnel where a controlled column of air lifts you and lets you “fly” your body. It sounds like a gimmick until you’re standing there watching the wind do the work.
The realism comes from the feedback loop. You lean, adjust, and feel the tunnel respond instantly. Your instructor guides you into the correct body position, then helps you steer your movement inside the airflow. Because there’s no jumping and no parachute to manage, you can focus on the part that matters most: body control and the sensation of weightlessness.
I also like that the experience is framed as both thrilling and learnable. It’s not just “hold on and hope.” You’re taught how to fly your body like a skydiver would after exiting a plane—so even if you’re a first-timer, you’re not totally guessing.
You can also read our reviews of more tours and experiences in Gold Coast.

The Two-Flight Package: What You Get and How It Compares
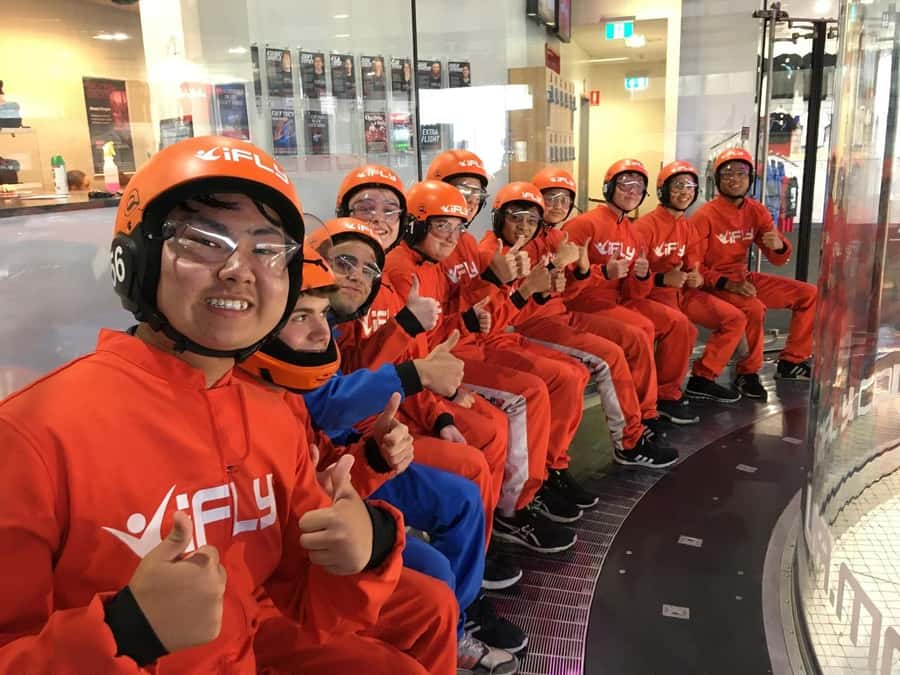
This is one of the main reasons the $66 per person price feels easier to justify. The package includes 2 flights for 1 person, and that second run matters. You’re not paying for a single moment; you’re paying for a short learning curve, then a chance to apply it immediately.
The provider describes this as giving you twice the amount of free-fall time than a tandem skydive. Even if you don’t compare it minute-for-minute, the practical outcome is clear: you get more total time in the airflow during your session. That usually means you’ll get better control on the second flight, because you’ll have already “decoded” the tunnel once.
There’s also a pacing advantage. In many intro activities, you get nervous, then it’s over. Here, the structure gives you time to settle in, learn the basics, and then run the second flight with more confidence.
One caution from real-world experience: one booking note said the daughter didn’t receive the second flight. That’s not something you should assume will happen to you, but it’s a good reminder to arrive on time and confirm your session flow at check-in, so both flights are actually scheduled for your booking.
From Check-In to Gear-Up: Your 90-Minute Rhythm
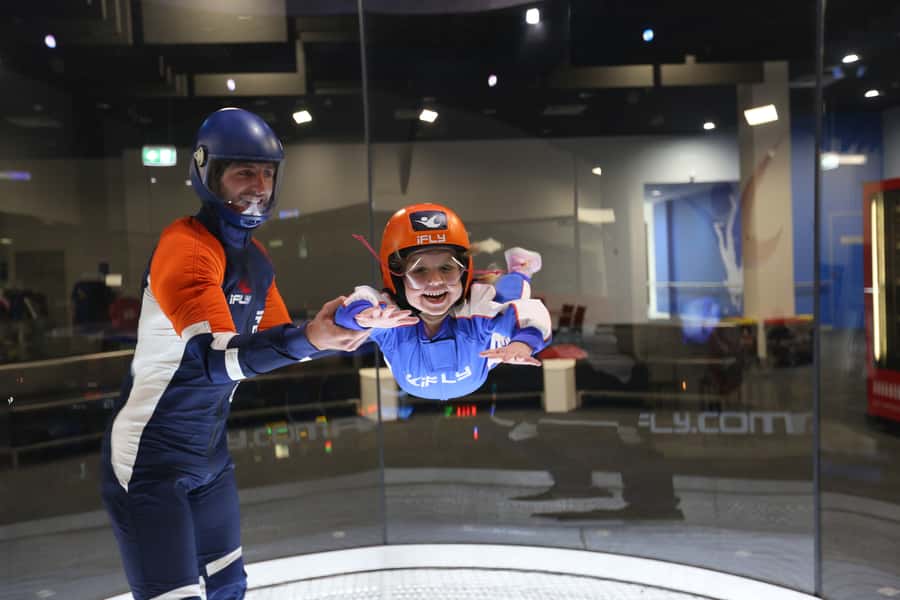
Your total time on site is about 90 minutes, including training. Plan your morning or afternoon so you’re not rushing or hoping to “squeeze it in.” The facility also requires you to arrive 1 hour before your chosen flight time (and they note you should arrive no later than 60 minutes before). If you show up late, you may lose flexibility—and late arrivals can’t be refunded.
On arrival, you’ll check in at reception and meet your instructor. Then comes the gear-up: you’ll be fitted with a flight suit, plus a helmet and goggles. The kit matters more than it sounds. The suit helps with airflow stability, and the helmet/goggles protect you and help everyone concentrate on flying, not gear adjustments.
After the briefing and gear-up, you’ll get coached into the flight portion. Your instructor will guide you into the airflow and teach you the basic body movements. Only then do you get your actual tunnel time.
Once your two flights are done, you’ll complete the experience with a personalized flight certificate. It’s a nice touch because it turns the moment into something tangible you can show off later—especially if you’re going with family or friends.
Finding the Place: Red Floor Entrance, Stairs, and a Backup Door
Location matters with short, structured activities like this. iFLY is set up so you can find it easily once you know where to look.
Use the red floor entrance to get inside. If you go that way, the flight crew meets you up the stairs for check-in. If that route is inconvenient, there’s also a rear entrance option on Appel Street with a lift.
This is one reason arriving early is smart. If you hit the building entrance wrong (or the stairs slow you down), you still have time to check in, get your gear, and start your briefing without stress.
How the Flight Works Inside the Glass Wind Tunnel
Here’s the key concept to understand before you go: there’s no parachute and nothing attaching you to the ground. Your experience is built around the wind.
You lean into the airflow inside the giant glass tunnel. The tunnel creates a column of air that lifts you, then stabilizes you enough for your instructor to help you learn the right body position. From there, you guide your movement by using your posture and arm/leg positioning—very much like a skydiver would learn for free-fall control after jumping from a plane.
The instructor does a hands-on coaching role during the session. You’re not expected to master everything instantly. You’ll be guided into position, then you’ll practice the movements your instructor teaches. The goal is to make you feel what free-fall is like while keeping it safe and controlled.
The adrenaline comes in waves. First, there’s the moment you step into the airflow and realize you’re truly being lifted. Next, there’s the fun part: when your body starts responding to your control. It’s the kind of experience that can make you want a second go—not because the first one wasn’t enough, but because you finally understand what to do.



What the Instructor Teaches (and Why It Matters for First-Timers)
A lot of “thrill” activities fail first-timers. They assume you’ll figure it out midair.
This format is different because the training is part of the experience, not a pre-ticket lecture. You’ll get a quick briefing, then your instructor guides you into the tunnel airflow and teaches you how to fly your body. That matters because indoor flight is about body position more than courage.
I also like that this activity is described as exciting for teens and realistic for experienced skydivers. That suggests the instruction aims to scale. A first-time flyer can learn the basics safely, while someone more advanced can likely appreciate the control side.
You’ll probably leave feeling that you learned something, not just that you survived a ride. That’s why people talk about wanting to return with friends and family—it’s not only the thrill, it’s the repeatable skill.
Who This Suits Best: Ages, Safety Rules, and Health Limits
One of the biggest selling points is the broad suitability. The experience is positioned for people from age 3 to 103. That doesn’t mean every child will manage every step comfortably, but it does signal that the setup is built to work across ages.
That said, there are firm limits you need to respect:
Weight rules
- If you’re under 180 cm tall: you must weigh less than 105 kg.
- If you’re over 180 cm tall: you must weigh less than 115 kg.
Not suitable
- Pregnant women
- People with heart problems
- People with back problems
- Children under 3 years
- People over the listed weight limits in the not-suitable notes
Health and injury caution
- Those with prior heart problems, or neck/back injuries, should consult a doctor before their flight date.
- People with previous shoulder dislocations are strongly advised not to fly.
What to bring
- Comfortable clothes
- Closed-toe shoes
Also, the instructor is listed as English-speaking, so if you prefer instruction in English, you’re good.
On accessibility: the facility is wheelchair accessible, and they state they can fly people with certain physical disabilities, including amputation and paraplegia. If accessibility affects your specific situation, it’s worth checking directly with the provider before you lock anything in.
Price and Value: Is $66 Actually a Good Deal?
For $66 per person (and a duration of about 90 minutes), you’re getting a package—not just a single ride. Your booking includes:
- 2 flights for 1 person
- Comprehensive training session
- Rental of flight suit, helmet, and goggles
- Hands-on personal assistance from your flight instructor
- A personalized flight certificate
That list is why this feels like decent value. If you only paid for one short airflow segment, it would be harder to justify. But with two flights, you’re effectively paying for instruction plus a longer total experience.
It also helps that the barrier to entry is low. No experience is required. That matters when you’re traveling with family: the kids can enjoy it without needing prior skills, and adults don’t spend the whole session worrying they’ll “do it wrong.”
So the real value question isn’t “Is it expensive?” It’s “Do you want the best bang-for-your-time in a single visit?” If yes, the 2-flight structure is the selling point.
The Most Praised Bits: Fun, Family-Friendly Coaching, and Real Control
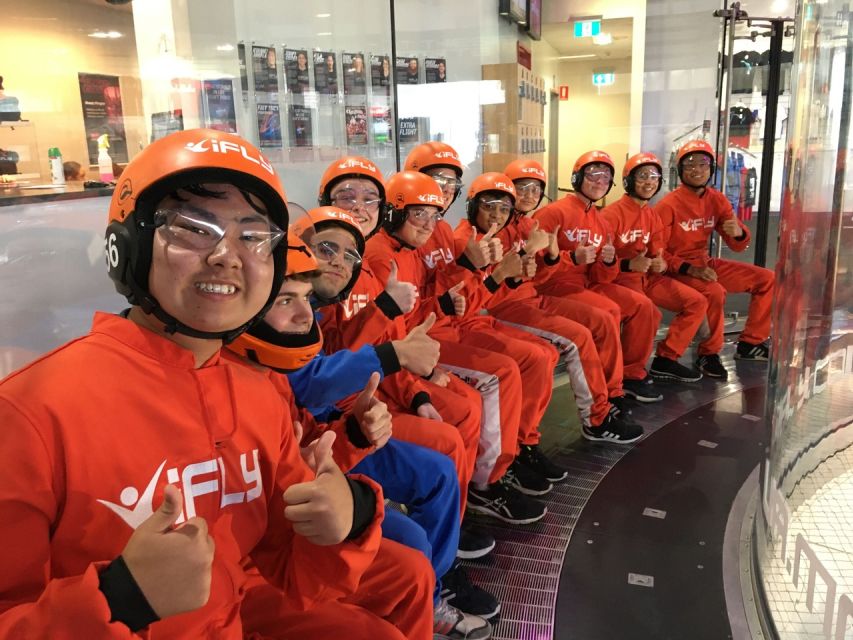
Based on the overall rating (4.8 with 82 reviews), the consistent theme is enjoyment plus good instruction.
A common highlight is how attentive the instructor feels. That’s not fluff—inside the tunnel, the instructor’s guidance is what turns the wind into flying rather than a wobbly scramble. Another repeated vibe is family-friendly fun. People recommend it for families and friends because it gives everyone a shared story, not just separate “watch while someone else rides” moments.
There’s also a practical takeaway: when it’s well-run, you end up looking forward to going back. That suggests the skill and confidence you gain is real enough that people want another go with better control.
And remember the one noted hiccup: one person’s session didn’t include a second flight. That’s rare-sounding from the way the overall rating trends, but it’s still worth treating timekeeping as part of your success plan.
Should You Book It for the Gold Coast?
Book it if you want a high-adrenaline activity that’s learned, not just endured. It’s a great option when you’re traveling with mixed ages, because it’s designed for kids as young as 3 and adults who want a fun challenge.
Skip it (or check with your doctor) if you fall into the listed non-suitable categories, especially heart concerns, pregnancy, and back problems. Also take the weight/height rules seriously so you’re not stuck with surprises on the day.
If you’re on the fence, here’s my quick decision checklist:
- You’ll be happier with two chances to fly, not one quick taste
- You can arrive early and follow the timing rules
- You’re comfortable following safety and health limits
If those check out, this is one of the more straightforward “do it once” experiences on the Gold Coast—and it’s one you can actually imagine repeating.
FAQ
What’s the duration of the Gold Coast indoor free-fall experience?
It takes approximately 90 minutes total, including training (about 1 hour 45 minutes including training).
What’s included in the 2-flight package?
You get 2 flights for 1 person, comprehensive training, rental of a flight suit, helmet, and goggles, hands-on assistance from an instructor, and a personalized flight certificate.
What should I wear or bring?
Wear comfortable clothes and bring closed-toe shoes.
How early do I need to arrive?
You must arrive 1 hour before your chosen flight time. They also note you should arrive no later than 60 minutes before your flight time.
Are there weight or height limits?
Yes. If you are under 180 cm tall, you must weigh less than 105 kg. If you are over 180 cm tall, you must weigh less than 115 kg.
Is it safe for kids and seniors?
It’s described as suitable for anyone from 3 years old up to 103 years old, with the stated eligibility rules and instructor guidance. Children under 3 years are not suitable.