REVIEW · YULARA
Uluru: National Park Astronomy Tour with Telescope and Photo
Book on GetYourGuide →Operated by Uluru Astro Tours · Bookable on GetYourGuide
Stars take over the outback here, and this Uluru evening sends you away from town lights to hunt for constellations and planets above the red earth. I love how the guides tie what’s in the sky to what matters in daily Indigenous astronomy, so it feels less like a lecture and more like learning a new language.
I also really like the hands-on pace: you get telescope time plus a guided viewing session where you can actually connect the bright dots overhead to real targets, including things like the Milky Way and Saturn. On top of that, you finish with a professional photo taken under the stars that you can download later.
The main thing to watch is that the tour can involve bigger groups and shared equipment, which means you might wait a bit for telescope access and the photo session. If the Moon is bright on your night, you may also see fewer faint stars than you hoped.
In This Review
- Key things to know before you go
- Uluru Astro Tours: what the 150 minutes really feels like
- Pickup with an Atrip bus: getting to the stargazing zone
- Leaving the city lights behind: why the timing and location matter
- The guided night-sky talk over Uluru and Kata Tjuta
- Telescopes and binoculars: what you can realistically expect to see
- Photo under the stars: the included professional shot
- Indigenous astronomy + modern science: what the guide stories add
- Moon phase and weather: your star count depends on the night
- What to bring: layers, shoes, and a steady camera plan
- Price and value: is $91 per person a fair deal?
- Who this tour fits best (and who should think twice)
- Final call: should you book Uluru’s astronomy tour?
- FAQ
- Do I need a National Park Pass for this tour?
- How long is the Uluru night astronomy tour?
- Is pickup and drop-off included?
- What is included in the ticket price?
- Are telescopes provided?
- What languages are the guides?
- What should I bring for the evening?
- Is there a professional photo included?
- Can I bring my own camera or tripod?
- When is the best time to see more stars?
Key things to know before you go
- Dark-sky location away from light pollution makes the Milky Way look far more dramatic
- Guides use lasers and storytelling so constellations are easier to find and remember
- Telescopes + binoculars help you spot planets and deep-sky objects beyond naked-eye sight
- Professional digital photo is included and shot against Uluru and the night sky
- Weather and moon phase matter for how many stars you’ll see clearly
Uluru Astro Tours: what the 150 minutes really feels like
This is a focused, night-time astronomy tour in the Uluru and Kata Tjuta region, built around one simple goal: help you see more stars, understand what you’re looking at, and leave with a photo you’ll actually want to frame. The stated duration is 150 minutes, but in practice, your whole evening stretches longer because of pickup and drop-off.
That’s a good thing. In this part of Australia, the night sky changes fast, and you want enough time to get used to the dark, catch key constellations, and still enjoy the telescope session without rushing. The tour also includes pickup and drop-off from your accommodation, so you aren’t juggling logistics at night.
You can also read our reviews of more tours and experiences in Yulara.


Pickup with an Atrip bus: getting to the stargazing zone
Your evening starts with pickup from your hotel. On the day of your tour, the operator emails the confirmed pickup schedule, and you should look for a bus labeled Atrip. This matters because stargazing tours run on tight timing: you’re trying to reach the low-light area before the sky fully locks in.
Once you’re on the road, the tour moves you toward a spot where light pollution is minimal. That setup is what makes everything after feel so worth it. Even a great guide can’t beat a bright horizon, so the drive is doing real work for you.
Leaving the city lights behind: why the timing and location matter
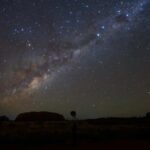
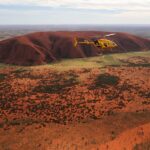
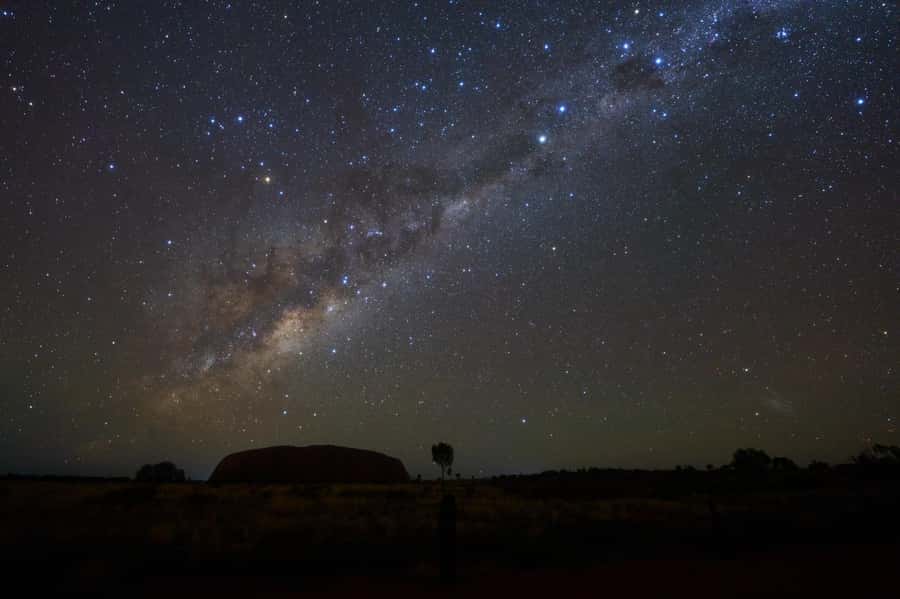
The biggest difference-maker is the dark-sky setting. In these outback conditions, you can experience the night sky the way it was meant to be seen—thick with stars, with the Milky Way standing out in a way you just don’t get near towns.
I like that the tour explicitly takes you away from light pollution rather than doing astronomy right at the hotel strip. You feel the change as the lights drop away: first the sky looks like normal darkness, then suddenly it starts filling in, especially once your eyes adjust.
The guided night-sky talk over Uluru and Kata Tjuta

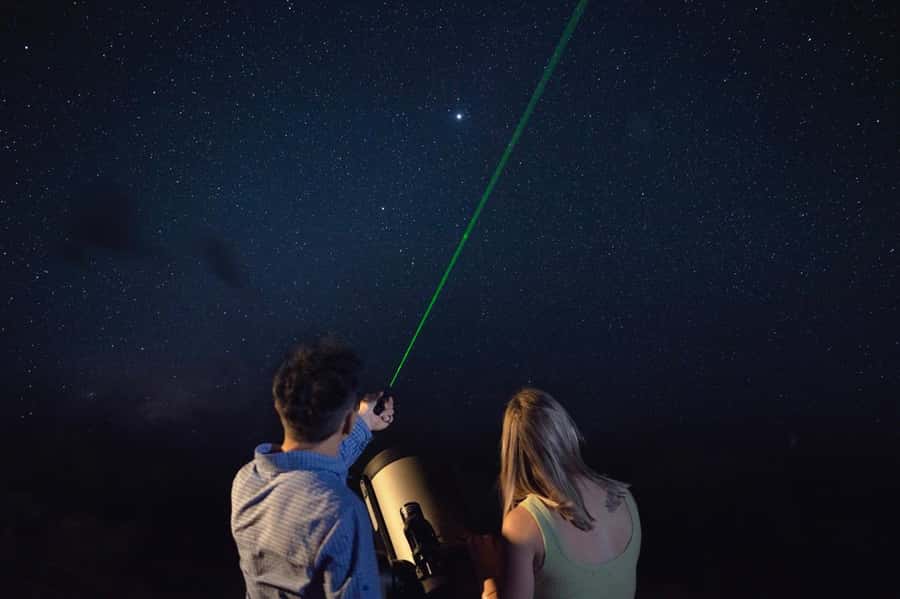
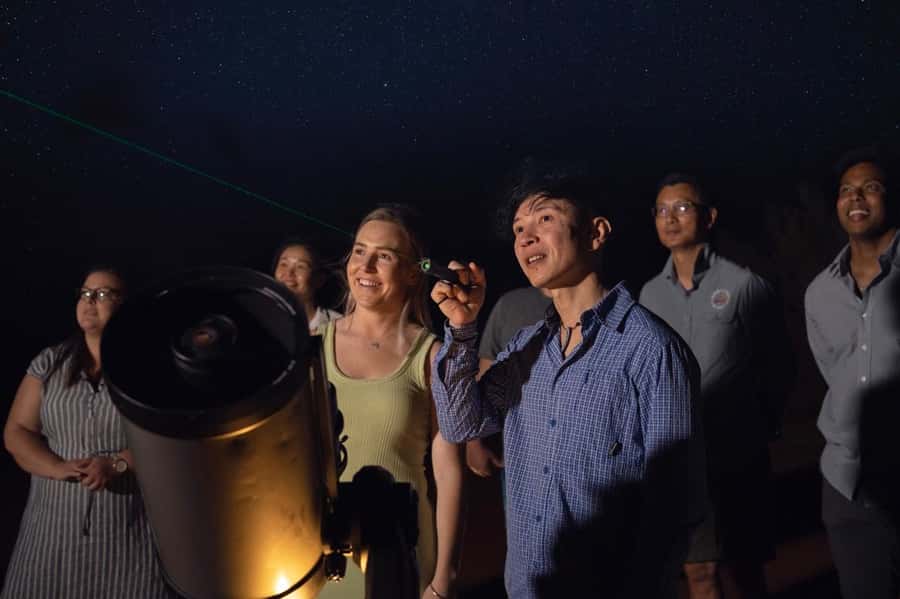
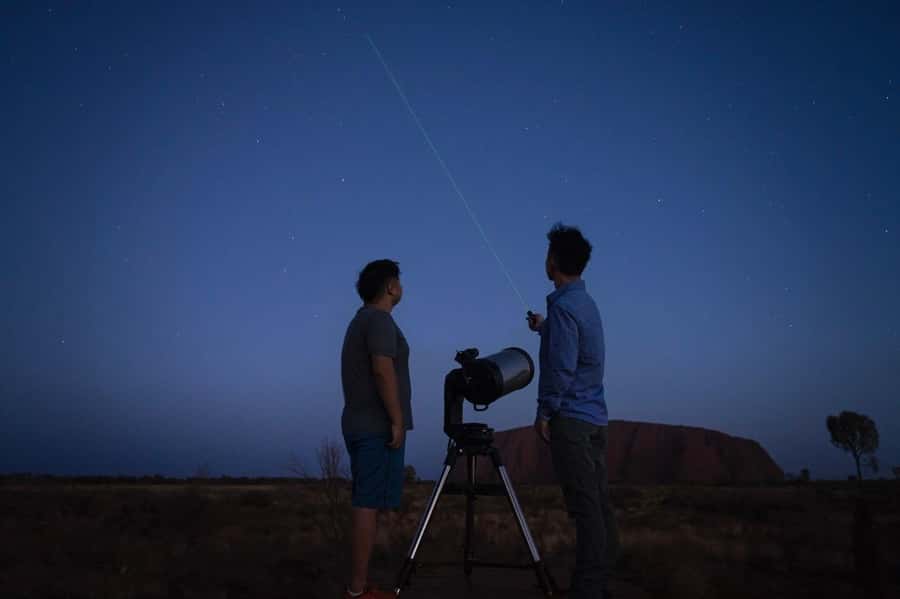
The heart of the tour is the guided stargazing session. You’ll sit out under the stars while your guide points out key constellations and explains what you’re seeing. Multiple guides are described as friendly and easy to talk to, and several reviews call out a mix of modern astronomy with Indigenous astronomy stories.
You’ll also notice a practical technique: guides use lasers to help you find objects fast. That’s a big deal. Without that pointer, you can spend the whole night guessing where the guide is aiming. With it, you can follow along and build your own mental map of the sky.
And yes, this is also where you might hear names like Neil, Lucy, Zack, Ollie, and Olina attached to guides. The common thread across the guide styles is that they keep the group engaged while still teaching enough to make you feel like you learned something.
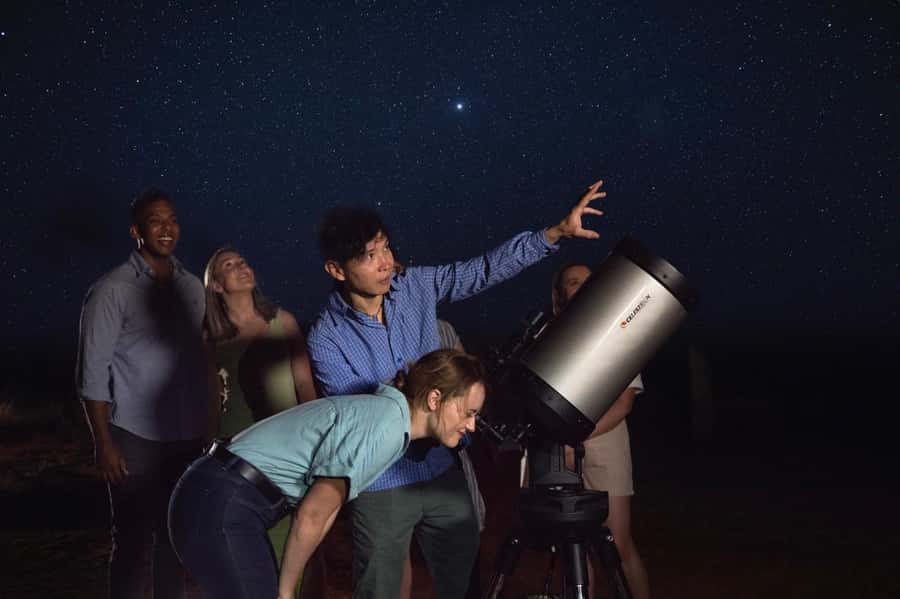
Telescopes and binoculars: what you can realistically expect to see
Telescopes are the main action point. The tour includes telescope usage and also uses binoculars during the viewing. The goal isn’t just to stare at a night sky image—it’s to see details that your eyes can’t pick out unaided.
From what people report, telescope highlights often include:
- Saturn’s rings (a true crowd-pleaser if conditions are steady)
- The Pleiades, also called the 7 sisters
- Other planets and deep-sky objects such as clusters and nebula-like targets
Here’s the practical part: telescope time is shared. Reviews mention that the waits can be long on busier nights because there may be fewer scopes than people. That doesn’t ruin the experience, but it does change the vibe from one-on-one to a more timed rotation.
If you’re the type who gets impatient, plan your mindset for “show up, wait your turn, then enjoy fast.” If you’re the type who enjoys looking up and listening while you wait, you’ll probably love it even more.
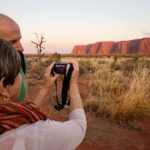


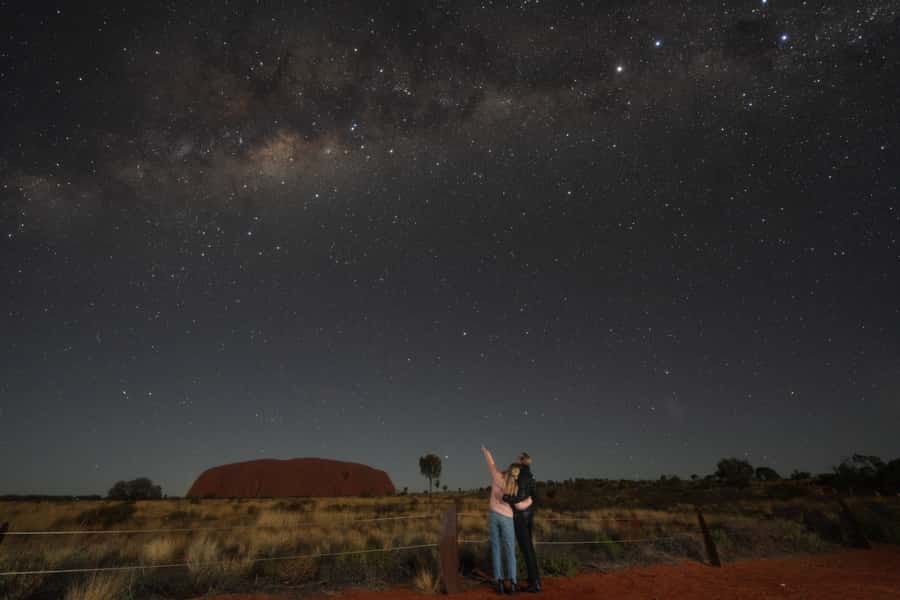
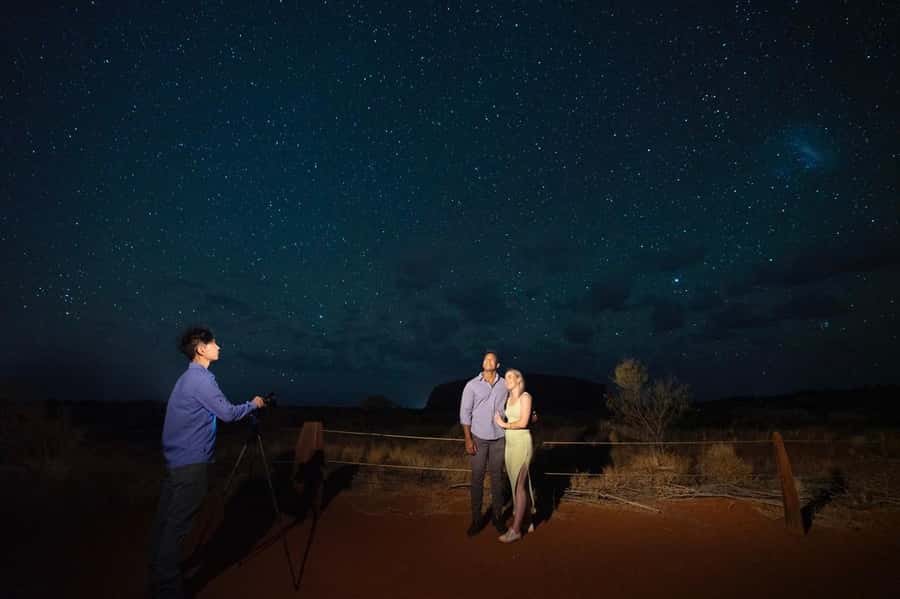
Photo under the stars: the included professional shot
You get a professional photograph taken with the star-filled sky and Uluru as the backdrop. This is included as a digital image you can download later, and it’s genuinely one of the best value parts of the tour because you don’t have to line up your own composition and camera settings in the dark.
How the photo works in real life:
- It’s taken near the end of the stargazing session.
- There can be a line, especially when the group is large.
- Some people report waiting 45–60 minutes for the photo, partly because it’s a long-exposure style shot and photographers need time to capture each person properly.
If that waiting time would bother you, try to stay calm and use it as downtime. If you bring your own camera, you might also want to shoot during the telescope session rather than saving all your camera time for the pro photo moment.
Indigenous astronomy + modern science: what the guide stories add
One reason this tour stands out is the blend of sky science and cultural meaning. You’ll hear stories that connect constellations to Indigenous astronomy and everyday interpretation of the sky. Even if you only catch parts of it, the effect is memorable because it reframes the night sky from random dots to a system with stories.
At the same time, the guides also explain the celestial mechanics behind what you’re seeing, from constellations to planets and deep-sky targets. Reviews often say the explanations stay friendly and understandable, and guides ask and answer questions rather than just talking at the group.
This is where the “value” lives. A telescope show is fun, but a guided explanation makes it stick. You go home not just with pictures, but with a few constellations you can actually find again.
Moon phase and weather: your star count depends on the night
You can’t control the sky. What you can do is understand the trade-offs.
A bright Moon (like a first-quarter or fuller phase) can wash out faint stars. Some reviews mention reduced star visibility on moonlit nights, even when the tour itself still runs smoothly. The good news is you might still see bright targets like planets, and the sky can still look spectacular depending on conditions.
Clouds can also affect what you see. On one night, people describe clouds easing enough to still enjoy a Milky Way moment later. Translation: don’t assume bad weather ruins everything. The tour’s structure gives time for skies to improve.
What to bring: layers, shoes, and a steady camera plan

This is outback night-time, so dress like you plan to sit still. The tour’s guidance is clear:
- Warm clothing
- Closed-toe shoes
- Reusable water bottle
In reviews, people also mention blankets being available and folding seating setup. Still, don’t treat blankets as a magic shield. Bring layers you can adjust—cooler at the telescope time, sometimes warmer earlier. One person notes it can feel quite cold in May, while another says some evenings feel warm enough not to over-pack. The best approach is layers you can peel on the way to the viewing spot.
If you love astro-photography, the tour encourages you to bring your own camera and tripod. If you’re using a phone, ask your guide how to stabilize and adjust settings for low light. Reviews mention guides helping people set up phones for better night-sky shots.
Price and value: is $91 per person a fair deal?
At $91 per person, this sits in the “worth it if you’re the type who wants real experiences” category. Here’s why.
You’re not paying just for someone to point at the sky. Your money also covers:
- a guide-led session with sky interpretation and Indigenous astronomy storytelling
- pickup and drop-off
- telescope usage
- an included digital professional photo
If you were to piece it together yourself—transport to a dark-sky location, telescope access, and a pro photo—the cost and hassle add up quickly. For many people, the photo alone is the proof of value, because it gives you a high-quality image that would be difficult to nail on your own in the dark.
So the real question isn’t the ticket price. It’s whether you’re going to use the time well: show up dressed for cold, keep your phone ready, and actually look up during the wait periods.
Who this tour fits best (and who should think twice)
This tour is a great match if you:
- want a guided introduction to southern-sky astronomy
- care about seeing planets and deep-sky objects through telescopes
- like the idea of leaving with a professional night-sky photo
It also works well for families and teens, with reviews mentioning it as a favorite activity for younger visitors. If your group has mixed ages, telescopes and lasers give everyone a “what do I see next?” moment.
Who might think twice:
- If you hate waiting for photo time or telescope rotation, you may feel the schedule pressure.
- If you’re a hardcore astrophotographer expecting total control and unlimited camera time, the structured format may feel a bit time-boxed.
Final call: should you book Uluru’s astronomy tour?
I think you should book this if you want a low-stress night under dark skies, guided with enough explanation to make the view meaningful. The telescope time and the included professional photo are the two big reasons it feels like value, not just entertainment.
Book it with two expectations in mind: the sky quality depends on the night (Moon and clouds), and shared equipment can mean some waiting. If you can roll with that, this is one of those Uluru experiences that stays with you long after the photo download.
FAQ
Do I need a National Park Pass for this tour?
No. You do not need to bring your own National Park Pass on this tour.
How long is the Uluru night astronomy tour?
The duration is 150 minutes.
Is pickup and drop-off included?
Yes. Pickup and drop-off are included. Look for a bus with the name Atrip, and your pickup schedule is emailed to you on the day.
What is included in the ticket price?
The tour includes the experience, guide, pickup and drop-off, telescope usage, and a digital photograph.
Are telescopes provided?
Yes. Telescope usage is included, along with binoculars during the viewing.
What languages are the guides?
The live tour guide is available in English and Chinese.
What should I bring for the evening?
Bring warm clothing, closed-toe shoes, and a reusable water bottle.
Is there a professional photo included?
Yes. You can have a professional digital photograph taken with the star-filled sky and Uluru.
Can I bring my own camera or tripod?
If you love astro-photography, the tour suggests bringing your own camera and tripod so you can take your own shots.
When is the best time to see more stars?
You’ll see more stars on nights with darker skies. If the Moon is bright, it can reduce the number of faint stars you notice.